That little spark of an idea for your DIY plush doll? That’s exactly where the best products begin. As manufacturers, we see that initial passion turn into successful toys all the time. The real trick is learning to see your creation not just as a one-off project, but as a polished prototype ready for a bigger stage. This guide is written from the factory floor, offering the practical, manufacturer-level knowledge needed to bridge that gap.
Thinking Beyond the Hobby Project
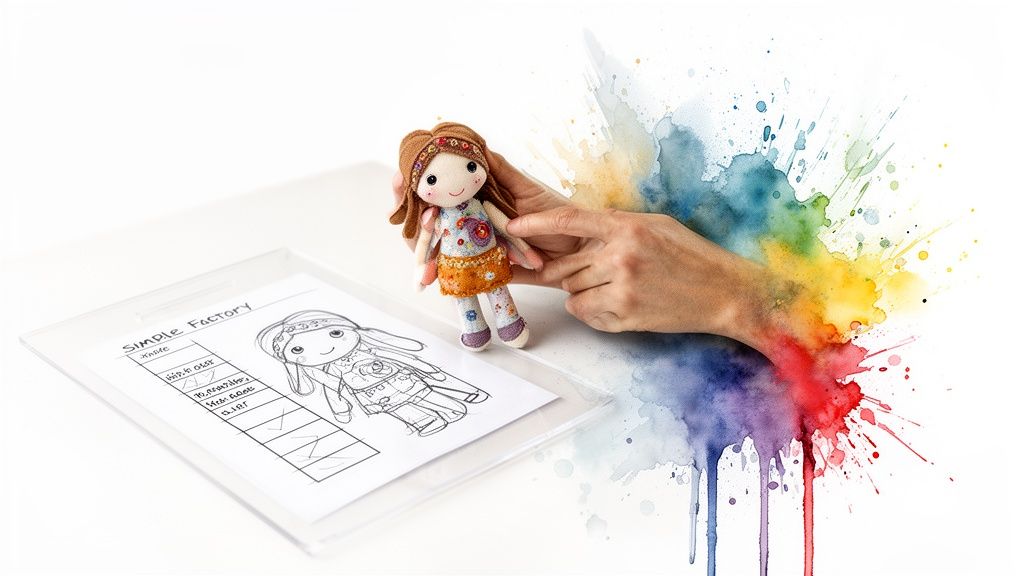
Many of our largest clients started with a single, handcrafted doll. The leap from a personal project to a commercial product, however, requires a shift in mindset. It’s about treating your DIY doll as the foundational blueprint—the master prototype—for something scalable.
Here at FunEnjoy Toys, we understand this transition can be daunting. We’ve written this guide to pull back the curtain on the manufacturing process. We’ll cover everything from material selection and pattern design to quality control and logistics, giving you the insider knowledge to prepare your design for production.
The Manufacturer’s Mindset
Adopting a manufacturer’s mindset means evaluating every design choice through the lens of cost, safety, and scalability. Your creativity is the heart of the design, but production readiness is its skeleton.
Ask these critical questions early:
- Material Durability: How will that cozy fleece hold up after repeated washing and rough play? A fabric suitable for a display piece may fail quickly in the hands of a child.
- Seam Strength: Are hand-sewn stitches robust enough for commercial production? We conduct tensile strength tests on seams to ensure they meet safety standards and don’t pose a risk.
- Child Safety Compliance: Does the design include small parts like buttons or plastic eyes? Commercial toys must comply with safety standards like EN71 (Europe) and ASTM F963 (USA), which have strict rules about small parts on toys for children under three.
- Replicability: Can each pattern piece be cut and sewn identically, hundreds or thousands of times? An intricate, free-handed design is impossible to replicate consistently at scale.
From Prototype to Product
Your handmade doll is more than a craft; it’s your first physical sample. It’s the tangible tool that allows a manufacturer to provide an accurate quote and map out a production plan. By considering these professional details from the first stitch, you set your design up for a smooth journey from your sewing table to our production line.
A well-made DIY prototype is the single most important communication tool between a creator and a manufacturer. It answers questions that sketches and descriptions cannot, ensuring your vision is executed precisely.
This guide provides the knowledge to create a DIY plush doll that is not only full of personality but also engineered like a professional product, ready for what comes next.
Selecting Your Materials and Tools Like a Pro
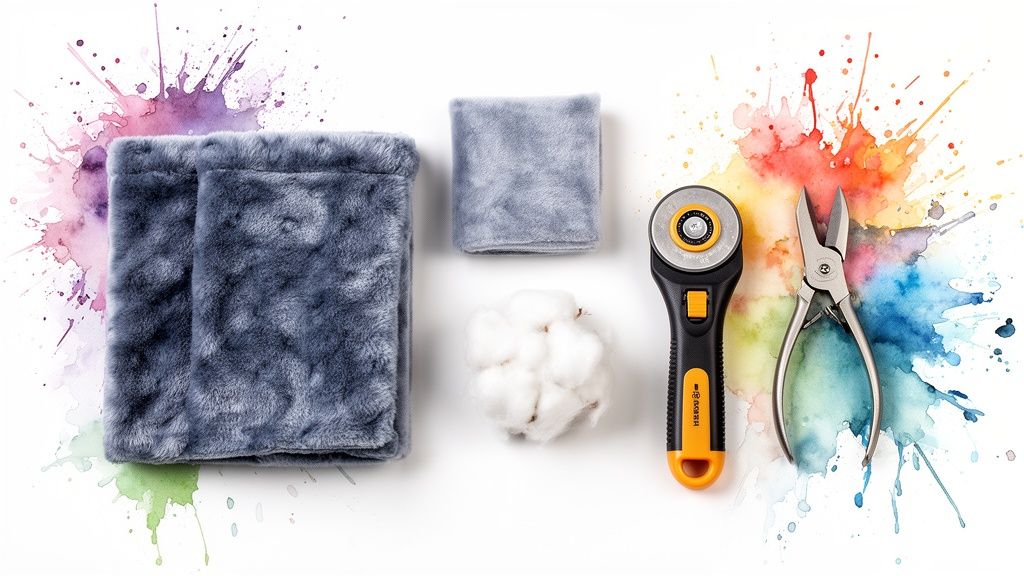
When a creator brings us a new design, the first technical discussion is always about materials. The fabric and filling you choose for your DIY plush doll prototype define its look and feel. Our job is to balance that vision with the practical realities of manufacturing, durability, and cost.
Choosing materials is a strategic decision that impacts the entire project, from the final aesthetic to its performance in safety testing.
A Factory Insider’s Guide to Plush Fabrics
Our sample room contains hundreds of fabric types, but a few are industry workhorses for specific reasons. Understanding these materials helps you build a production-ready prototype.
- Minky: Supremely soft with a slight stretch. Ideal for ultra-cuddly characters, but its stretch requires careful pattern engineering and skilled cutting to avoid distortion during mass production.
- Velboa: A low-pile faux fur offering a soft texture without Minky’s stretchiness. Its shorter fibers are essential for designs with detailed embroidery, as stitches remain crisp and visible instead of sinking into the pile.
- Fleece: A durable and forgiving fabric, easy to sew for beginners. However, its tendency to “pill” (form small fiber balls) with wear means we typically reserve it for accessories or specific applications rather than premium retail toys.
Manufacturer’s Tip: We frequently guide clients toward velboa when their artwork includes fine lines or small text. The embroidery clarity on a low-pile surface is superior, which is critical for brand logos or delicate facial features.
Picking the Perfect Filling for Weight and Feel
The stuffing, or filling, determines the “squish factor,” weight, and a significant portion of the cost.
- Standard Polyester Fiber Fill (PP Cotton): The industry standard. It’s lightweight, hypoallergenic, and cost-effective. We use different “deniers” (fiber thicknesses) to achieve the precise firmness required for each project.
- Memory Foam: Used for “slow-rise” squishy toys. Chopped memory foam creates a dense, satisfying feel but is heavier and more expensive, typically reserved for premium sensory products.
- Eco-Friendly Fillings (PLA): Polylactic Acid (PLA) is a biodegradable polyester derived from renewable resources like corn starch. It has a similar feel to PP cotton but with a strong sustainability appeal. It carries a higher cost but is a major selling point for eco-conscious brands.
Setting Up Your Workspace Like Our Sample Room
The right tools are essential for a clean, professional-looking prototype. While a basic needle and thread are a start, upgrading your toolkit elevates your work to a professional standard.
- Rotary Cutter and Self-Healing Mat: Far superior to scissors for cutting pattern pieces. A rotary cutter provides clean, precise edges without distorting the fabric, ensuring all pieces are identical.
- Fabric Shears: A high-quality pair of sharp scissors used exclusively for fabric. Cutting other materials dulls the blades instantly.
- Hemostats (Locking Forceps): Our secret weapon for perfect stuffing. These long, locking tweezers allow us to place small tufts of filling into tight corners—like paws or ears—for a smooth, lump-free finish.
- Fabric Marking Tools: A disappearing ink pen or chalk pencil allows you to transfer pattern markings accurately, vanishing without a trace on the final product.
By selecting your materials and tools with a manufacturer’s perspective, you’re not just making a doll; you’re engineering a prototype that is already optimized for production.
Designing a Production-Ready Pattern
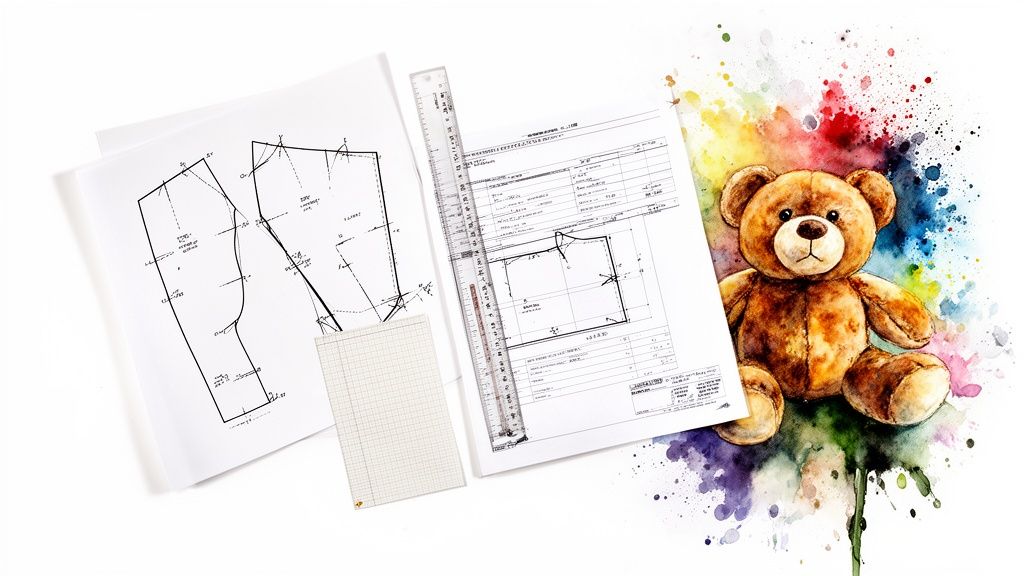
A fantastic prototype is born from a fantastic pattern. In the factory, the pattern is our technical blueprint, the universal language that translates your vision into a repeatable product. A clean, well-drafted pattern is the difference between a smooth production run and costly, time-consuming revisions.
From 2D Sketch to 3D Form
The manufacturing process begins by deconstructing your 2D design into a series of flat shapes that, when sewn together, create a 3D form. We break down a character into its core geometric components. A bear, for example, is a collection of ovals, circles, and tubes.
- Body: Typically two large oval pieces (front and back).
- Head: A sphere created from two, four, or six curved panels (gussets) for a perfectly round shape.
- Limbs: Simple tubes with flat oval end caps for paws.
- Ears & Snout: Smaller, distinct components attached during final assembly.
The key is to visualize how these flat pieces will curve and join to create volume once stuffed. We recommend starting with simple shapes; complexity can be added later once the basic form is perfected.
The Anatomy of a Manufacturer-Friendly Pattern
For production, pattern pieces need more than just an outline. These details are non-negotiable.
First, a precise seam allowance is critical. The industry standard for most plush toys is 5-6mm (approx. 1/4 inch). This allowance must be added consistently to every sewn edge. Inconsistent seam allowances result in mismatched pieces and a distorted final product.
Next are notches. These small marks along the cutting lines serve as alignment points for our sewing team. For example, matching notches on a body and arm piece indicate the exact attachment point. This eliminates guesswork and ensures every doll is assembled identically. You can learn more in our guide on how to design your own plush toy.
The Tech Pack: Your Design’s Bible
If the pattern shows how to make your plush, the technical pack (or “tech pack”) specifies what it’s made of. This comprehensive document accompanies your prototype and leaves no room for misinterpretation.
A professional tech pack must include:
- Detailed Illustrations: Orthographic views of the plush (front, back, side).
- Material Specifications: A complete bill of materials, listing each fabric type (e.g., Velboa, Minky) and its placement.
- Pantone Colour Codes: Using the Pantone Matching System (PMS) is the only way to ensure precise color replication. “Light blue” is subjective; PANTONE 2925 C is a precise standard.
- Dimensions: Exact measurements of the finished product and its key features.
- Embroidery & Printing Files: High-resolution vector files (.AI, .EPS) for print and digitized embroidery files (.DST) are required.
Creating a thorough tech pack signals to a manufacturer that you are serious and have considered every detail. This level of preparation is standard for brands looking to produce here. In 2023 alone, traditional toy retail sales in China reached RMB 90.7 billion, with factories in hubs like Zhejiang producing a staggering 7,111,600 tonnes of toys, all driven by a huge demand for reliable OEM/ODM services.
Remember, the goal of a production-ready pattern and tech pack is to eliminate assumptions. If a detail isn’t specified, the factory will have to make a decision, and it may not be the one you wanted. Be clear, be precise, and be thorough.
Bringing Your Plush to Life: Professional Sewing & Assembly
With a production-ready pattern in hand, the next stage is assembly. The techniques used here differentiate a charming homemade craft from a durable, professional-quality product that can withstand years of affection. Our artisans rely on methods perfected over thousands of production cycles, focusing on strength, precision, and a flawless finish.
Building Seams That Can Handle Anything
The fundamental principle is sewing with “right sides together.” Place two fabric pieces with their finished sides facing each other, sew along the seam allowance line, and then turn the piece right-side out. This conceals the raw edges inside for a clean join.
For high-stress seams—where limbs attach to the body or along the main torso—a simple stitch is insufficient. Our standard is a sturdy backstitch. This stitch locks itself by doubling back, creating an incredibly durable seam that resists pulling and stretching.
Another critical technique is clipping curves. On inward-curving seams, snip small V-shaped notches into the seam allowance. On outward curves, make small, straight snips. This releases fabric tension, preventing puckering and allowing the seam to lie perfectly flat and smooth once turned. It is essential for achieving a professional shape.
The Art of the Perfect Stuff
The stuffing process is as critical as the sewing. The goal is a smooth, firm fill without lumps or soft spots. This requires patience and the right tools, like hemostats.
Follow this process for a lump-free finish:
- Start Small: Tear off small, fluffy tufts of stuffing. Attempting to insert large clumps is the primary cause of lumpy toys.
- Go Farthest First: Begin by stuffing the extremities—the parts furthest from the opening. For a bear, this means filling the tips of the ears and paws before the head and limbs.
- Pack and Sculpt: Use a stuffing tool to guide the fill into every corner. Pack it firmly enough to be resilient but not so tight that it strains the seams.
A common error is under-stuffing. A loosely stuffed doll appears limp and will wrinkle and lose its shape quickly. Aim for a firmness that feels solid when squeezed yet retains a huggable quality.
The final closure is often a weak point in DIY projects. After stuffing, the opening must be sealed. We exclusively use an invisible ladder stitch. This hand-sewing technique creates a closure so clean it appears as if the seam was never open. Learn this and other essential techniques in our guide on how to sew a stuffed animal.
Finishing Touches and Thinking About Safety
The final details—eyes, nose, mouth—give your plush doll its personality. From a manufacturing standpoint, these features are also critical safety components.
Embroidered Features vs. Safety Eyes
| Feature Type | Description | Safety Considerations (EN71/ASTM) |
|---|---|---|
| Embroidery | Features are stitched directly onto the fabric with thread. | Inherently safe for all ages as there are no small parts to detach. This is the required method for toys intended for children under 3. |
| Safety Eyes | Plastic eyes or noses secured with a locking washer on the back. | Must pass a stringent “pull test” to ensure they cannot be removed. They are prohibited on toys labeled for ages 0-3 as they can become a choking hazard. |
At our facility, all components, especially safety eyes, undergo rigorous pull-testing to meet EN71 (Europe) and ASTM F963 (USA) standards. Our advice: design your prototype with embroidered features from the start. This ensures the core design is safe for all ages and prevents costly redesigns later.
Mastering these assembly and finishing steps is how you transform a creative idea into a well-crafted, safe, and production-ready product.
Taking Your DIY Plush From One to One Thousand
You’ve designed, sewn, and perfected your DIY plush doll prototype. The next question is, “How do I make more?” This is the pivotal moment where you transition from hobbyist to product creator, and selecting the right manufacturing partner is paramount. The journey from a single doll to a full production run is a structured, step-by-step process.
What the Manufacturing Journey Looks Like
The process begins when we receive your physical prototype and detailed tech pack. From there, our team translates your creation into a production-ready sample. This sampling phase is the most critical part of the entire process.
Here is a typical production timeline:
- First Factory Sample (5-10 Days): Our pattern makers and sample artisans create the first official factory-made version of your plush, engineered for mass production.
- Client Review and Revisions: We ship this sample to you for inspection. This is your opportunity to provide feedback for revisions. Minor adjustments are a normal and expected part of perfecting the product.
- Mass Production (20-30 Days): Upon your final approval of the sample, we initiate mass production. The exact timeline depends on order quantity and design complexity.
This is a simplified overview of our factory workflow.
Each step includes rigorous quality control checkpoints. This ensures that every unit in the final shipment is an exact match to the approved sample.
Do You Need OEM or ODM?
When engaging with manufacturers, you’ll encounter two key terms: OEM and ODM.
OEM (Original Equipment Manufacturer): This is the model for creators with a finished design. You provide the complete blueprint (prototype and tech pack), and we manufacture it to your exact specifications. It is your design; we provide the production expertise.
ODM (Original Design Manufacturer): In this model, you may have an idea but not a finalized design. We collaborate with you to develop the concept, create the patterns, and then handle manufacturing. It is a design-and-build partnership.
If you’ve followed a DIY guide to create your own plush, you are seeking an OEM partner. Your finished prototype is your intellectual property; our role is to replicate your vision flawlessly at scale.
Let’s Talk About Costs and MOQs
The Minimum Order Quantity (MOQ) is the smallest order a factory will accept. For new creators, this can seem like a significant barrier. However, modern manufacturing offers flexibility. We often work with clients on MOQs as low as 100-500 pieces, enabling independent artists and small businesses to enter the market.
The unit cost is driven by several key factors. Understanding these allows you to make design choices that align with your budget.
When creating your prototype, keep these cost drivers in mind. It’s a balance between creative vision and production practicality. The table below shows how considerations shift from a one-off project to mass production.
DIY Prototype vs. Mass Production Considerations
| Factor | DIY Prototype Focus | Mass Production Focus |
|---|---|---|
| Fabric | Use any unique or special fabric you can find. | Select fabrics that are consistent, available in bulk, and cost-effective. |
| Complexity | Add intricate details and many separate parts. | Simplify the design to reduce sewing time and labour costs. |
| Embroidery | Hand-stitch complex, artistic facial features. | Design for machine embroidery; simplify lines and reduce stitch count. |
| Finishing | Spend hours on perfect hand-finishing. | Design for efficient and consistent assembly line finishing. |
| Materials Cost | Not a primary concern for a single item. | A critical factor; small savings per unit add up significantly. |
| Safety | General safety for personal use. | Must meet mandatory legal standards like EN71/ASTM F963. |
Considering these factors early will save significant time and money. It helps you design a plush that is not only appealing but also commercially viable.
- Fabric Choice: Premium materials like long-pile minky or custom-dyed fabrics cost more than standard velboa.
- Embroidery Stitch Count: More detailed and dense embroidery requires more machine time, increasing costs. Simple stitched eyes are more economical than a large, complex chest logo.
- Complexity and Labour: A design with many small, intricate parts increases cutting and sewing time, which directly translates to higher labor costs.
- Safety Testing: Commercial toys legally require safety certification. Tests for standards like EN71 (Europe) and ASTM F963 (USA) are mandatory. These have a fixed cost, but the per-unit cost decreases significantly with larger order volumes.
Understanding these variables enables more productive discussions with potential manufacturers. For more guidance, see our article on finding the best stuffed animal companies to partner with.
Questions I Hear All the Time from Toy Creators
As a manufacturer, I field many questions from creators making the leap from DIY to production. The process is more straightforward than it appears. Here are answers to the most common queries we receive.
What’s a Realistic Budget for My First Production Run?
The answer is, “it depends.” For a small batch of 100-500 units, your budget comprises several components beyond the per-unit cost.
Here is a typical cost structure:
- Sample Development: Expect a one-time fee of $100-$300. This covers the skilled labor of our pattern makers and sample team to create a production-ready master prototype.
- Per-Unit Cost: Once the sample is approved, the price per plush can range from $5 to $25. This variation depends on design complexity, material choices, and embroidery detail.
- Safety Testing: This is non-negotiable for commercial products. Budget at least $500+ for mandatory safety certifications (e.g., EN71, ASTM).
- Shipping & Logistics: The cost to transport finished goods from our factory to you varies based on volume, weight, and destination.
Always request a detailed, itemized quote to understand exactly where your investment is going and avoid surprises.
How Do I Make Sure My Colours Are Perfect?
Color accuracy is paramount. The only professional method to ensure it is by using the Pantone Matching System (PMS). Providing specific Pantone codes in your tech pack removes all ambiguity.
“Sky blue” is subjective and leads to misinterpretation. PANTONE 292 C is a precise, universal standard that our fabric and thread suppliers use, ensuring perfect consistency across all components.
If you don’t have access to Pantone guides, you can mail us a physical fabric swatch for color matching in our lab. However, providing PMS codes from the outset is the fastest and most reliable method.
What if I’m Not Happy with the First Sample?
This is a normal part of the process. The sampling stage is a collaborative effort to perfect your design. Clear, specific feedback is crucial. Instead of saying, “I don’t like it,” provide actionable comments.
For example: “The ears are positioned 1cm too high,” or “The stuffing in the arms needs to be 15% firmer.” Supplying photos with markups is also extremely helpful. Most manufacturers, including us, include one or two rounds of revisions in the initial sampling fee. Our shared goal is a final product that you are completely satisfied with.
What’s the Biggest Mistake You See New Creators Make?
The most common and costly mistake is providing an incomplete or vague tech pack. An excited creator may assume the manufacturer will “figure out” the missing details. This inevitably leads to an incorrect sample, causing frustrating delays and additional revision costs.
Your tech pack is the definitive blueprint for your toy. A comprehensive document with precise measurements, material specifications, Pantone codes, and clean digital files is your best insurance against production issues. It signals professionalism and enables us to execute your vision flawlessly, saving time and money for everyone involved.
Ready to bring your plush creation to life with a team that gets it? At FunEnjoy PlushToys, we’ve been doing this for decades, and we’re passionate about helping creators like you succeed. Let’s work together to turn your DIY doll into a high-quality product ready for the market.